Yoga with Diabetes: ‘Sugar’ is Created by Pancreatic Stagnation; by Practising Four Asanas, Insulin Production Restarts.

Yoga manages blood sugar to treat diabetes and lowers blood sugar levels. Yoga asanas help the pancreas, which has been inactive owing to diabetes, start working again. The names of yoga poses that cure diabetes are listed here.
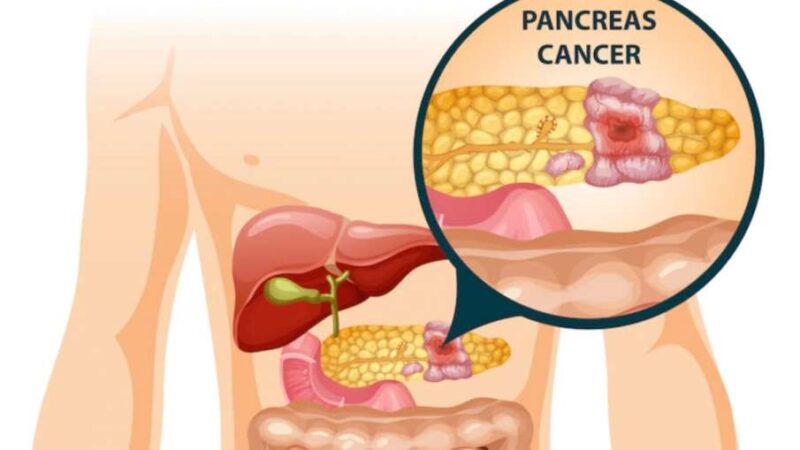
Diabetes is a serious condition that can steadily empty the body out if it is not managed. Care should be made in all areas, including diet and lifestyle, to manage diabetes. However, are you aware of how diabetes develops?
How did diabetes get started? In the body, the pancreas generates the hormone insulin, which regulates blood sugar. However, when the pancreas lowers or ceases producing, there is a corresponding decrease in insulin, which raises blood glucose levels.
What Should a Diabetic Patient Do?
Yoga should be practised to treat diabetes, according to Gaurav Chauhan, a Ministry of AYUSH certified yoga protocol instructor. Padahastasana, Mandukasana, Tadasana, and Vakrasana affect the pancreas and assist the organ in resuming insulin production.
1. Tadasana
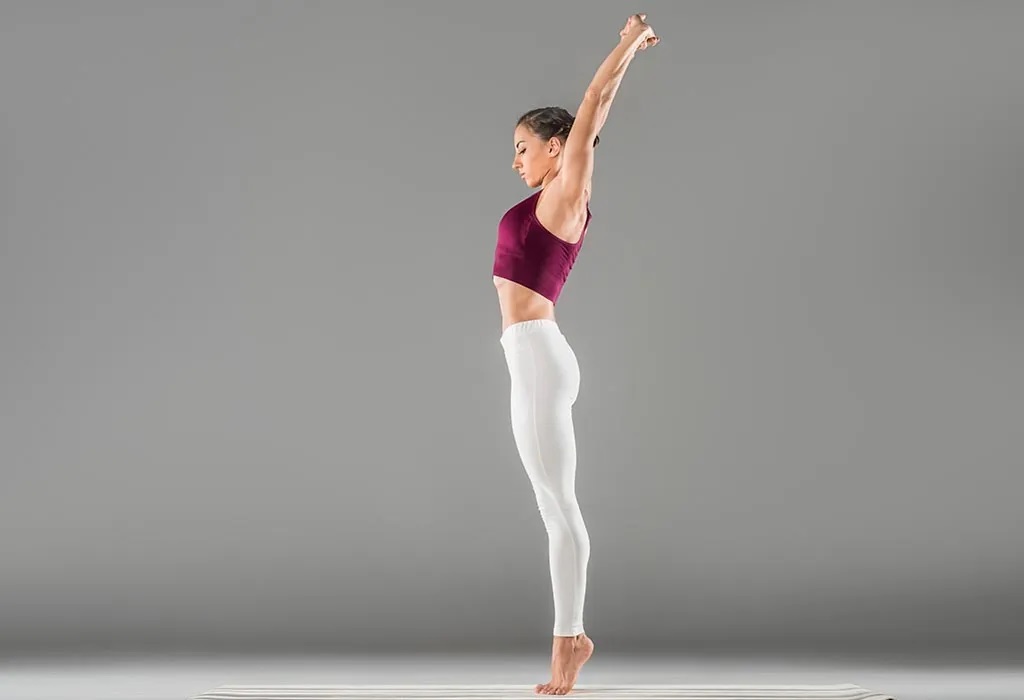
- First, maintain a two-finger space between your feet while standing straight.
- Keep the head just above the neck and the shoulders broad.
- Bring both hands forward and interlace the fingers while breathing.
- Turn the palm outward after joining the thumbs.
- As you breathe in again, raise your hands above your head with your elbows still straight.
- Lift both ankles while breathing once more, keeping the hands close to the ears.
- For a few seconds, extend the hand upwards and feel the stretch.
- Finally, maintain your heels on the ground and hang your hands down gently as you exhale.
2. Padahastasana
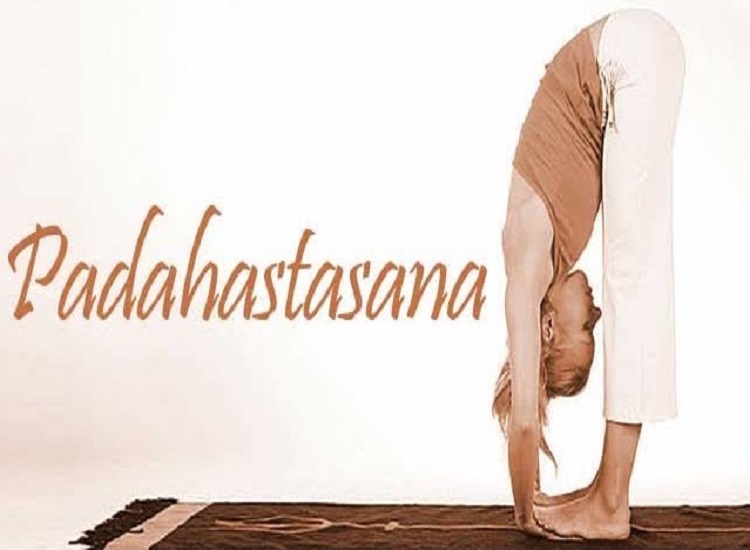
- First, place your feet together and stand.
- Take a deep breath in and raise both of your hands.
- Now, lean forward from the waist while exhaling.
- Try to maintain a firm footing with both hands on either side of the feet.
- After that, comfortably raise your hands and stand up while breathing.
3. Mandukasana
- First, assume the Vajrasana stance.
- Put the thumbs of both hands within the palm to seal the fist.
- Press the navel inward while making a joint fist with both hands.
- Now, as you exhale, lean forward from the waist while maintaining a forward gaze.
- Finally, sit up straight and breathe.
4. Vakrasana
- Initially, assume the Dandasana position and unite the legs by spreading them in front of you.
- The direction of both paws should be upward.
- While bending the right knee, keep your palms close to your hips.
- Your left knee should be close to your right heel.
- Now inhale while spreading your hands out so that they are shoulder-width apart.
- After then, turn your waist to the right while exhaling.
- Put the left hand holding the right ankle and the right hand behind the right hip.
- Continue looking over the right shoulder while maintaining head alignment.
- Breathe in this state for a few seconds.
- Only maintain the left paw pointed upwards while in this position.
- Finally, let out a breath and unwind.
Disclaimer:
This article is just meant to provide general knowledge. It cannot in any way serve as a substitute for any medication or kind of therapy. To learn more, always see your doctor.